 |
Thai Fisherman Pants
Pattern Journey
This is the combination of three posts on these pants, ending with a great
pattern, and some instructions to hopefully make it a little easier for you
to make. (click pic to view). |
 |
The Original Pattern
This original pattern was really just a series of measurements from
mediathinker and the pattern (this site is no longer posted). They did not turn out like I wanted (or had envisioned) so
off I took to find the perfect Thai fisherman pant pattern. The
mediathinker pattern is a good basic pattern, but I was after more style and
felt the design had great potential. Sometimes you get what you cut
and sometimes simple is just that - too simple and no line or style to it.
|
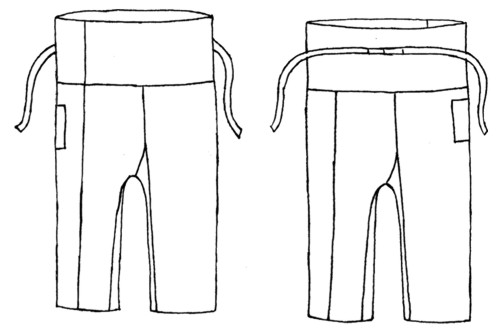 |
The Burda Pattern
This is the sketch for the Burda pattern for TFP (download
here
- it costs $2.50 and worth every penny. This pattern is no longer
available through Burda. I've included it
here but I don't publish that I have it.), It's not only the best one out
there, but has great line and style. When you're dealing with a simple
design - every little flaw (including the cut) is a glaring mistake!
|
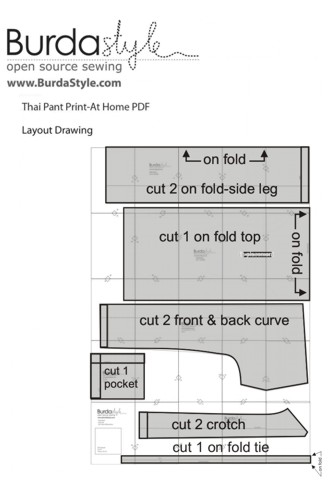 |
Burda layout
I had a lot of problems with this
layout, and finally made up my own (below).
It's just a little difficult to explain, however you cut one piece as if it
were two right sides, which sounds really wrong, but it is the right way to
make the pants. |
 |
Much easier view
Here's a much easier view...what you have to remember is to lay out each
piece (including those you cut twice) ALL of them on the
right side. |
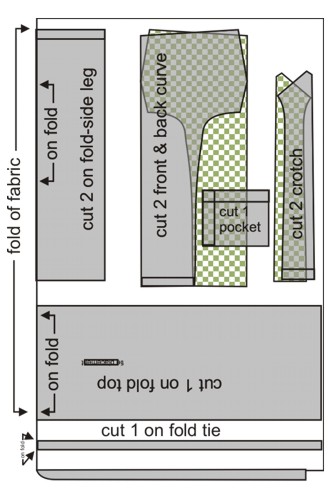 |
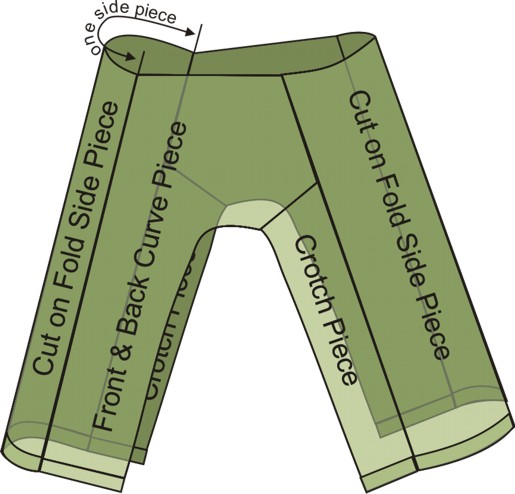
Here's the technical layout
You can see how you turn the crotch/pants piece so that you are cutting what
appears to be two pieces of the same side! Hope this is less confusing
with the graphic (remember click the picture to the left and it will take
you to a larger version).NOTE: The technique here is not to cut one
and then another reversed.....you cut two pieces with the pattern piece
right side up on the right side of the fabric. That sounds like you're
cutting two right sides, but you're actually not. It works out. |
 |
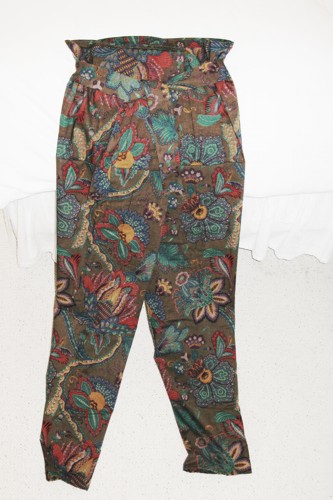
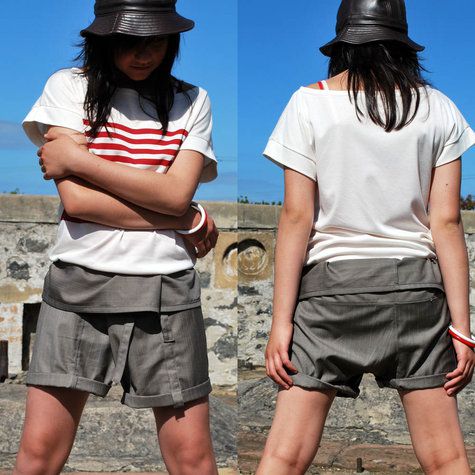
Final post
This pattern really made up well and has a lot of style and great lines
considering the pieces. I tried two different closure techniques - one
with buttons (ho hum - not my fav), and this one with a great tie and then
tucked in to the belt at waist. |
 |
Variations
One of the fun things about Burda is the variations that abound on that site
from not only the managers of the site but from participants as well.
Here's the site where you can download the pattern.
This site is no longer available either, however the picture
tells you what you need to know. You can easily cut the
length you like, and even make them a capri length. |
|
Update
After working with and wrapping this a number of times, I like the way the
Burda pattern ties and lays....this is more that authentic Japanese Samurai pant look.
It's more in keeping with the style of the pattern and line of the cut.
I folded the sides so that they meet in
center front. Click the photo to the left to get a better view of the
folds. The next thing is you can't get too picky about the fold
of the upper waist - let it just flop and it will be fine! |